
.png "Author Photo")

Many modern businesses and services revolve around booking systems, whether it's for transportation, events, or venue reservations. One crucial aspect of these booking systems is the ability to provide users with a visual representation of available seats or spaces, known as a seat map. Implementing a seat map in your application can greatly enhance the user experience, making it easier for customers to select their preferred seats and streamlining the booking process.
In this guide, we will explore the steps involved in implementing a seat map in your Android application, covering topics such as selecting the appropriate technology stack, handling implementation specifics, and integrating with backend systems for data management and reservation processing. Dive in!
Seat Map Functionality
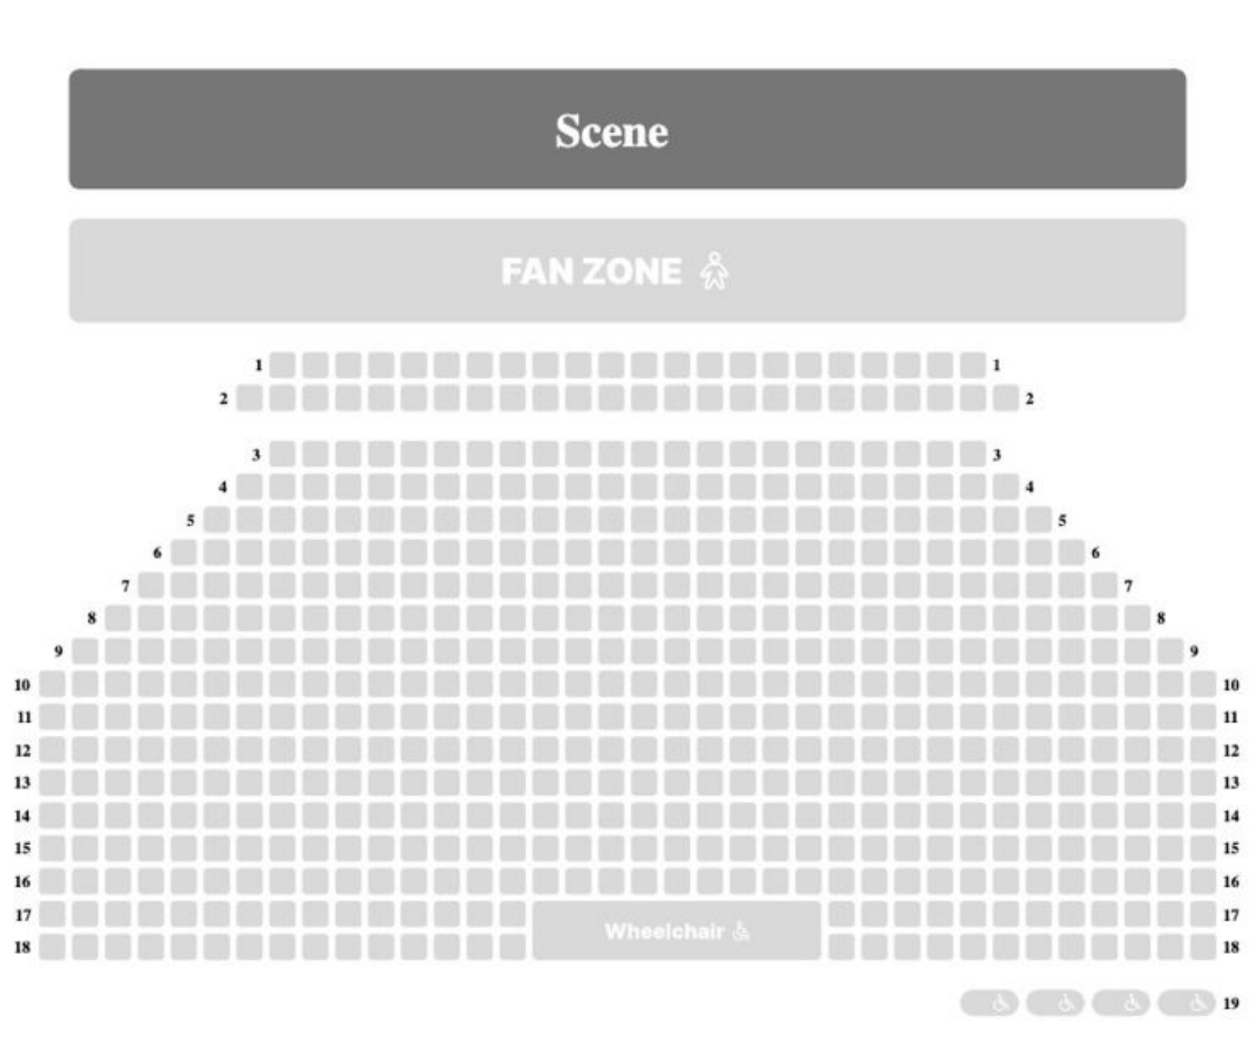
A well-designed seat map allows users to visualize the layout of the venue, including sections, rows, and individual seats. It provides a clear overview of available and reserved seats, enabling users to make informed decisions when selecting their desired seating arrangement. Additionally, a seat map can display helpful information such as pricing tiers, accessibility options, or special amenities associated with specific seating areas.
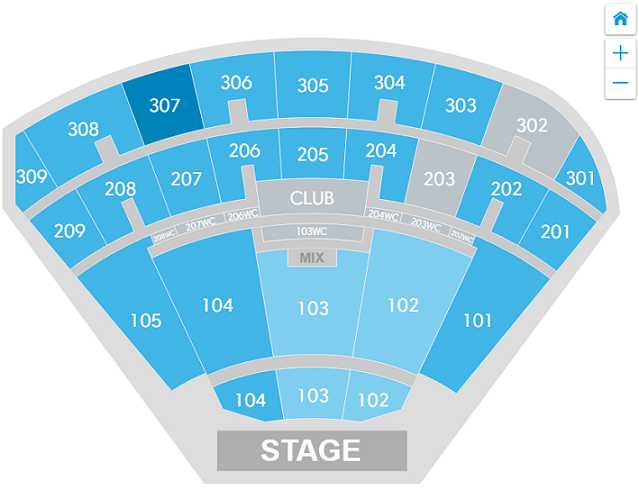
Users can conveniently explore and choose their preferred seats, considering factors like proximity to the stage, aisle access, and overall view. If the app consists of more than one seat map scheme, it is relatively easy to work with - you just create a custom component and work with it. The real challenge begins when there are multiple seat map schemes that can be received from the backend.
Benefits of Using Virtual Seat Map Tools
Integrating a seat map into your application not only improves the user experience but also offers several business benefits:
- Better customer experience: It can increase customer satisfaction by providing a seamless and intuitive booking process, potentially leading to higher conversion rates and revenue.
- Increased efficiency: A seat map can assist in efficient inventory management, allowing you to optimize seating arrangements.
- Maximized revenue: By offering customers the ability to select their seats, companies can implement dynamic pricing strategies based on factors like seat location and demand, maximizing revenue potential.
- Reduced errors: Virtual seat maps minimize the chances of errors associated with manual seat assignment, leading to improved accuracy in booking and reservations.
Implementation Process
Implementing a dynamic seat map hinges on two approaches, depending on the response received from the backend.
1. The first method uses JSON, which contains detailed coordinates and attributes for each seat. The seat map can be implemented as a custom view in this scenario. However, there are notable drawbacks to this approach:
- The JSON payload can become excessively large, impacting network performance even for medium-sized seat maps.
- Implementing interactions, particularly zooming and scrolling, can be intricate.
2. The second way is to receive an SVG that contains all the needed attributes. Example:
Then, we can put this SVG into a web view and interact with it using Javascript.
The main concern is actually writing JS code, which can be complex for some developers. Performance issues may also arise. However, as practice has shown, this approach has proven effective in performance, ensuring the seat map functions smoothly and responsively.
Solution Overview
We’ve prepared a solution overview, an example of Seat map implementation for an Android app using SVG and WebView. Seat map functionality includes zoom, periodic seat status updates, click interaction, and decorative shapes displaying. Our goal was to give stable features with a smooth user experience within an acceptable time frame.
Implementation Details
Upon receiving a client's request to implement a crucial seat map for concert hall ticket sales, we scrutinized various existing applications. Many simply presented a seat map within a web page. However, this approach raised concerns about user session management and the performance of displaying a web page within a WebView due to potential complexity.
To address these issues, we explored alternative solutions. Our investigation yielded two viable options, one of which involved leveraging an SVG-based approach, a method already familiar to our front-end developers. Consequently, we opted to pursue this route.
To implement the SVG-based seat map, we identified three key components:
- SVG data sourced from the backend.
- A web-view container within the application.
- A JavaScript (.js) file housing the necessary functions for interacting with the seat map.
Let's start with SVG. It must contain a strictly declared set of classes so we will know what elements should be interactable. By default, it looks like this:
As you see, it doesn’t contain any colors and is also not clickable. We need SVG elements to include strictly defined classes to color it and make it interactive. So, as discussed with backend developers, all interactive SVG paths will contain the class “seat.”
The next step to making the seat map interactive will be to link it with the .js file.
We will do it by including
into html body.
Now, we can execute functions contained in this file, apply CSS rules, etc.
First, the seat map must be placed correctly on the screen. We will add a few CSS rules inside seatmap_main.js for this:
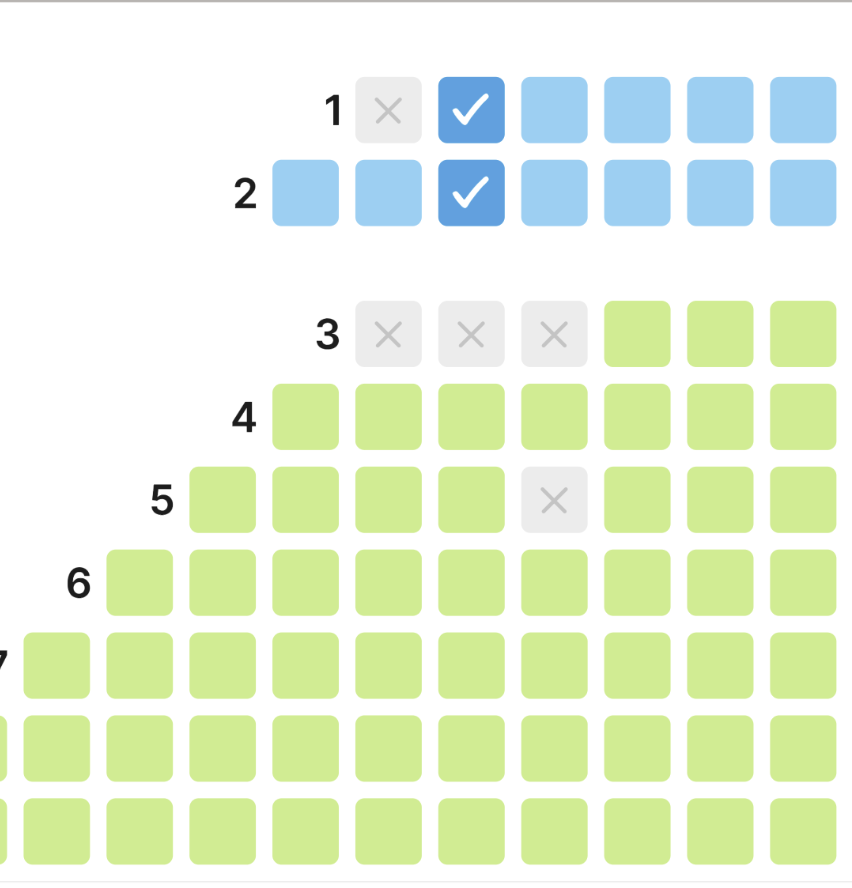
Next step will be to fill seat cells based on their statuses. There can be 4 available seat statuses:
- Disabled: The background is grey, and a cross icon is shown.
- Available: Custom background color (one from the list of available colors).
- Selected: Custom background color.
So, we need to create a CSS class for each state and then enable/disable it for cells when they are changed.
Also, we need to create classes for icons to show or hide them. By default, all icons should be hidden. For example:
The subsequent task involves assigning background colors to available seats. This task presents a challenge because the "path" element lacks inherent color information due to its dynamic nature. Additionally, for selected seats, the color needs to change to a brighter hue.
To address this issue, we devised a solution where the designer curated a specific, limited set of colors to assign to seats. We'll create a color map and then programmatically generate an "available" class for each color. Here's an example:
and function for creating color class:
Now, we can create a function to paint seats, grouped by color for "available" status, and with "null" color for "disabled state.
As previously noted, the interactive SVG items are assigned the class "seat" within their path elements. Consequently, we'll filter these elements and pass a list of their IDs into this function.
It's important to note that previous statuses will be cleared before updating to avoid overlap.
Once the initial painting iteration is finished, the selected seats require coloring. Therefore, we'll create a separate function for this purpose:
To be able to call js functions from our native code, we need to add this line in our .js file:
In Fragment, we need to enable Javascript for WebView:
Now we can execute our coloring functions. It is conducted with evaluateJavascript() method. Example:
The seat coloring feature is now complete, allowing us to update seat statuses periodically or when a user selects/deselects a seat. Consequently, the colored seat map will appear as follows:
Now, our next objective is to enable seats to be clickable. This entails registering an event listener in our .js file and creating a function that will transmit data from the SVG to the Fragment:
We check if an SVG item contains an ID that starts with "type:,” for example
The click listener will exclusively target relevant elements, excluding decorative and background elements. Since ticket information is dynamic and cannot be stored within SVG items, we'll transmit the seat ID to the Fragment. Within the Fragment, two iterations are necessary: first, locating the seat item in the list by its ID, and then retrieving the ticket attached to this seat by its ticket ID. Subsequently, we can proceed with the click event, displaying ticket variations or adding tickets to the cart. It's crucial to note that we won't manually change seat statuses, relying entirely on statuses from the backend. To respond to clicks within the Fragment, we'll register this function for the WebView:
The seat map seats now respond to clicks, allowing us to execute various actions such as displaying ticket variations for a seat or adding a seat to the cart. Below is an example where clicking on a seat triggers the display of a ticket variations bottom sheet:

So, the first iteration of the seatmap functionality is ready to use.
Conclusion
To achieve the initial iteration of a functional seat map, we've accomplished the following essential steps:
- Received SVG with the required structure from the backend.
- Embedded the SVG into a WebView and linked the script file.
- Mapped seats with their statuses, enabling coloring and periodic updates.
- Implemented seat click handling.
In contrast to embedding an entire web page in a WebView, utilizing SVG along with a straightforward .js file containing a few functions ensures decent and smooth performance. The client expressed complete satisfaction with our solution. Additionally, there's ample room to incorporate new functionalities and enhance the existing ones.
Further improvements
Given the time constraints during the development of this functionality, certain compromises were inevitable to expedite the process. However, as we move forward with the next iteration, it's imperative to address these compromises to prevent them from accumulating. Let's delve into them:
- Improving JS code: The JavaScript code, initially crafted by an Android developer unfamiliar with JavaScript, is ripe for refactoring and optimization. This step is crucial for enhancing efficiency and maintainability.
- Reducing CSS class manipulations: Currently, when updating seat statuses, the logic involves removing old classes and adding new ones. Although this approach doesn't significantly impact performance, it's worth investigating methods to refactor or streamline this process.
- Optimizing seat status updates: Currently, when adding or removing a ticket, all seats in the seat map are remapped. We should explore ways to optimize this process by comparing seat statuses between the current and new lists, updating only those seats where the status has changed. This optimization can potentially reduce unnecessary computations and enhance overall performance.
Our comprehensive services and dedicated team are here to streamline your development process, providing you with top-notch solutions while keeping a watchful eye on your budget.
.png)
Don’t hesitate to contact us to get started and receive a free consultation on how to build your software project!


